Hide your fleet. Read the board. Make every shot count.
Two opponents take turns firing at hidden ships. Sink the entire opposing fleet to win. This version has a no-touch rule and single-cell ships, so a little space goes a long way.
01 / GET YOUR BEARINGS
A small ocean. A whole fleet.
Each player has a 10 × 10 board. Rows run from A to J; columns run from 1 to 10. A coordinate such as C3 means row C, column 3.
Place all 10 ships before you play. Their lengths are 4, 3, 3, 2, 2, 2, 1, 1, 1, 1 cells, occupying 20 cells altogether.
■ ■ ■ ■ 1 × 4-cell ship
■ ■ ■ 2 × 3-cell ships
■ ■ 3 × 2-cell ships
■ 4 × 1-cell ships
Choose Start computer match to practise, Play online to join the public queue, or Invite a friend to share a private invitation. Guest play needs no account. Google sign-in is optional and saves your player record across sessions.
02 / DEPLOY
Place, move, rotate.
Pick an unplaced ship from the ship tray, then tap or click a board cell to place it. You can also drag from the tray. Select a placed ship to move it with the arrow controls or use Rotate ship to change its orientation. A ship must form one straight horizontal or vertical line.
With the board focused, arrow keys position the ship, Enter places it, and R rotates it. Escape cancels a drag. Return to tray removes the selected ship; Clear board starts your layout again. Auto place fills the remaining fleet for you.
Partial fleet example: a horizontal ship at C3–C5 and a vertical ship at F8–G8. Both are straight and stay within the board.
Keep every cell aboard
A three-cell ship starting at J9 and pointing right would need J11. The board ends at column 10, so that placement is rejected. Move its starting cell left or rotate it where there is room.
Two ships cannot share C4 or any other cell. A rejected move leaves your ship where it was; adjust the position and try again.
Overlap example, close-up C2–D6: C4 already belongs to the ship at C3–C5. The × marks where another ship cannot be placed.Boundary example: two cells fit at J9–J10, but the third would fall outside the board. OUT is not a playable column; move or rotate the whole ship.
Once every ship is placed, choose Ready fleet. When both players are Ready, placement locks and play begins. Until then, use Unready if you need to edit your layout.
03 / LEAVE ROOM
Ships cannot touch. Even diagonally.
Leave at least one empty cell between separate ships. That includes corners: two ships may not meet on a diagonal. The cells of a single ship are connected; the gap is between different ships.
Legal partial fleet, close-up B2–F7. Solid squares are ships; dots mark the first ship's surrounding exclusion zone. C3–C5 and E3–E4 have an empty row D between them.Two rejected alternatives, close-up B2–F7. A different ship at D5 touches C5 along an edge. A ship at D6 touches C5 at a corner. Each × is an illegal placement, not a fired shot.
04 / TAKE YOUR TURN
Select a coordinate. Then fire.
On your turn, select an unknown cell on the opposing board and choose Fire. Selecting a cell alone does not fire a shot. A Hit strikes a ship; a Miss strikes water. You cannot fire at the same cell twice.
Every shot ends your turn, whether it hits or misses. The other player takes the next turn unless that shot ends the Match. A hit does not grant an extra shot in this version.
Use Inspect your fleet to check incoming shots and your own fleet. Switch back to targeting when you are ready to act.
05 / FINISH THE JOB
A sunk ship tells you more.
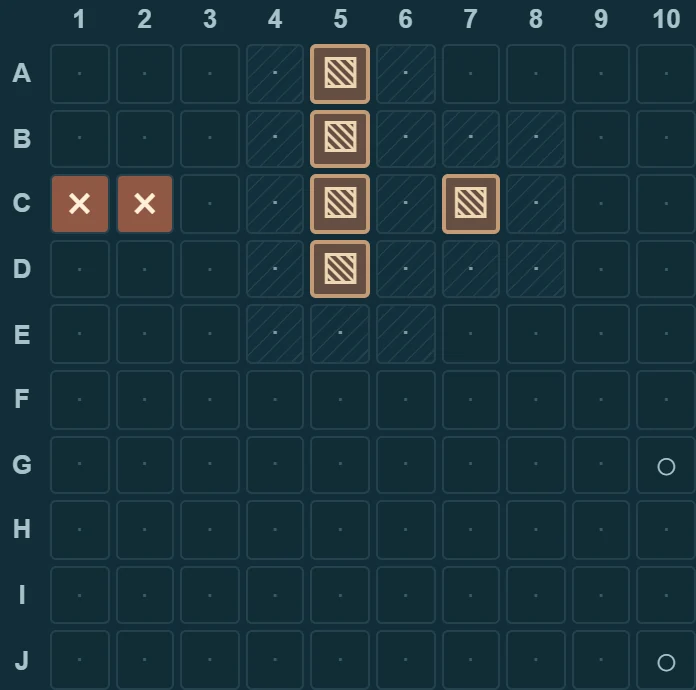
A ship is Sunk when every one of its cells has been hit. Under the no-touch rule, no other ship can be in its surrounding cells. The game marks those as Deduced empty cells: they were not fired Shots, and you do not need to shoot them.
Close-up B2–E7. Hatched squares at C3–C5 are the sunk ship. The surrounding dots are deduced empty, not misses. Other unknown cells can still hide ships.
Sink every ship in the opposing fleet to win. Remember the single-cell ships: each one sinks with one hit. The Match also offers resignation if you need to stop, which counts as a loss.
Choose your view
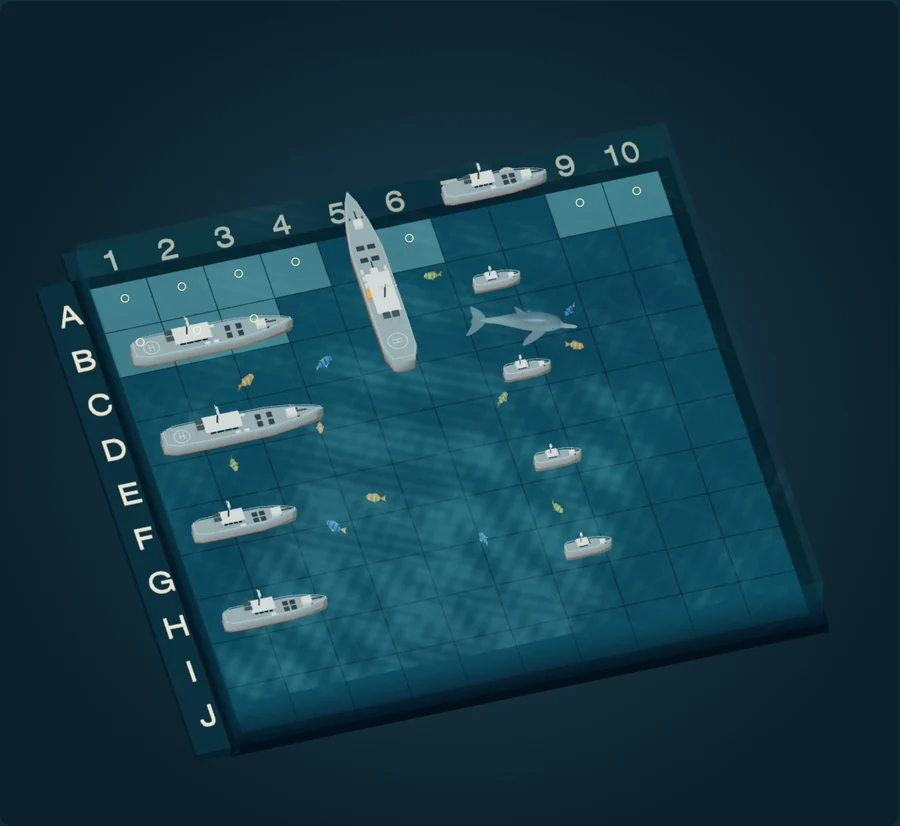
The 3D ocean and the 2D board use exactly the same fleet and rules. Open Settings to switch views on your phone or computer. Start with a computer Match to try placement and targeting at your own pace.
See the game before you play
Choose the 3D ocean or the 2D board in Settings. Switch views during a Match: your Fleet, Shots, and rules stay the same.
3D ocean. Inspect your own Fleet with detailed ships and an angled view of the water.2D board. Track Hits, Misses, and Sunk ships. The shaded cells around a Sunk ship are deduced empty; unsunk opposing ships stay hidden.